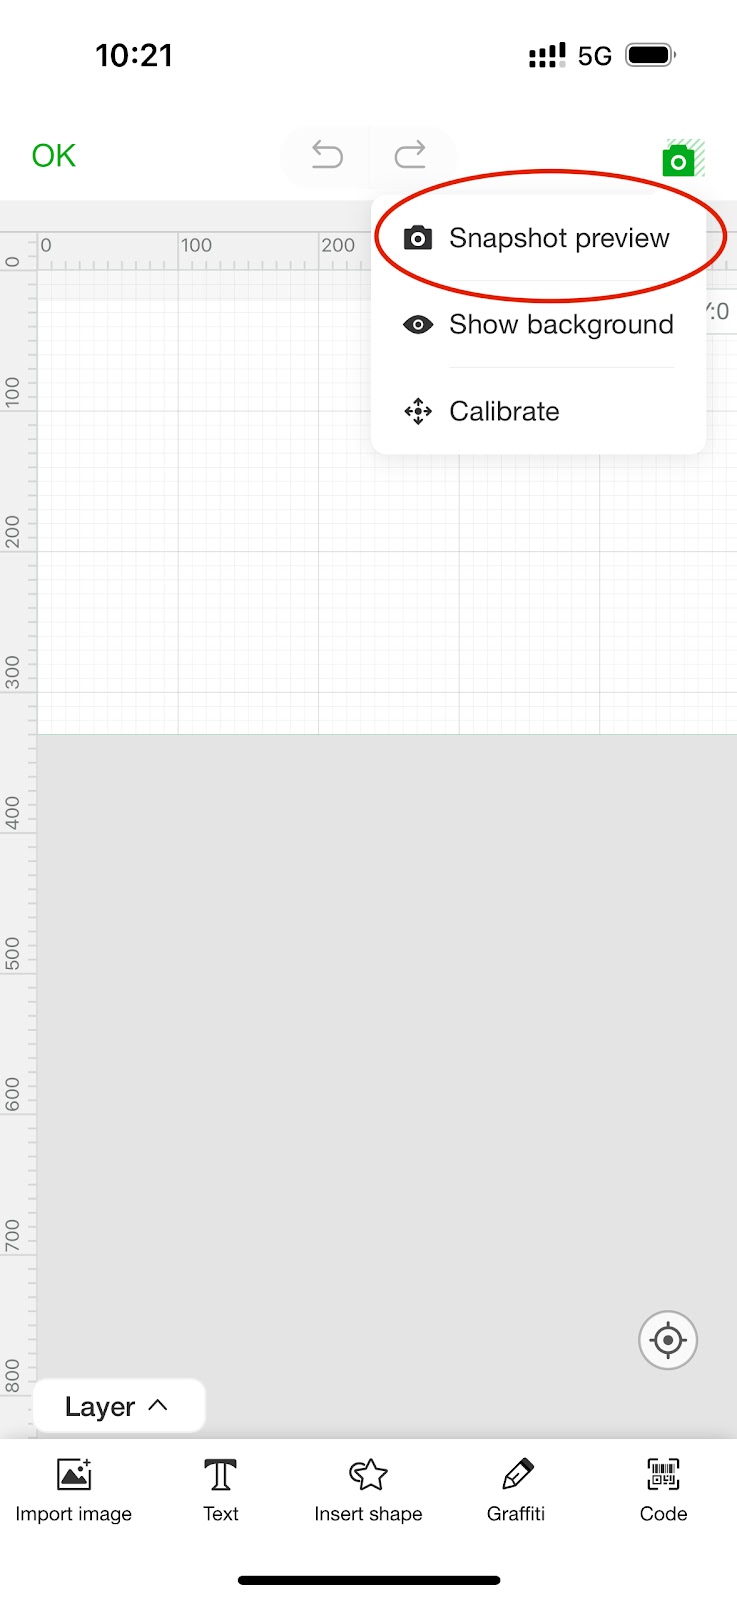
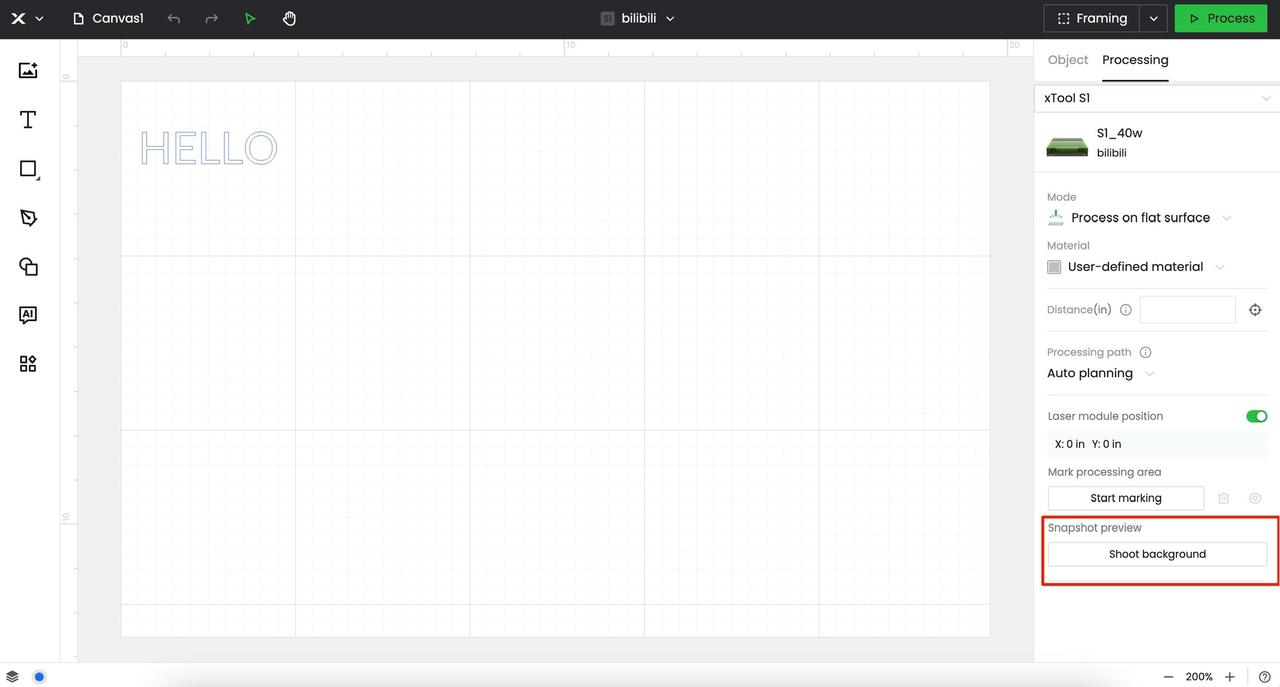
What is 'Snapshot Preview':
Snapshot Preview is all about previewing, positioning, and aligning more intuitively and precisely. Similar with the machine's built-in camera, By using your smartphone or iPad camera to capture the material and align its position, you can easily place your design elements into the right place.
How to Access:
This feature is accessible on XCS v2.0 PC software, and XCS v1.8 for both mobile and iPad. It's a straightforward way to place your design element precisely by using your mobile phone's camera to capture the baseplate.
 |  |
If you are using XCS v2.0 PC software, pair it with the mobile or iPad version (V1.8 or above) to complete the sticker placement and calibration steps before design.
Make Your Stickers
Printing (Highly Recommended):
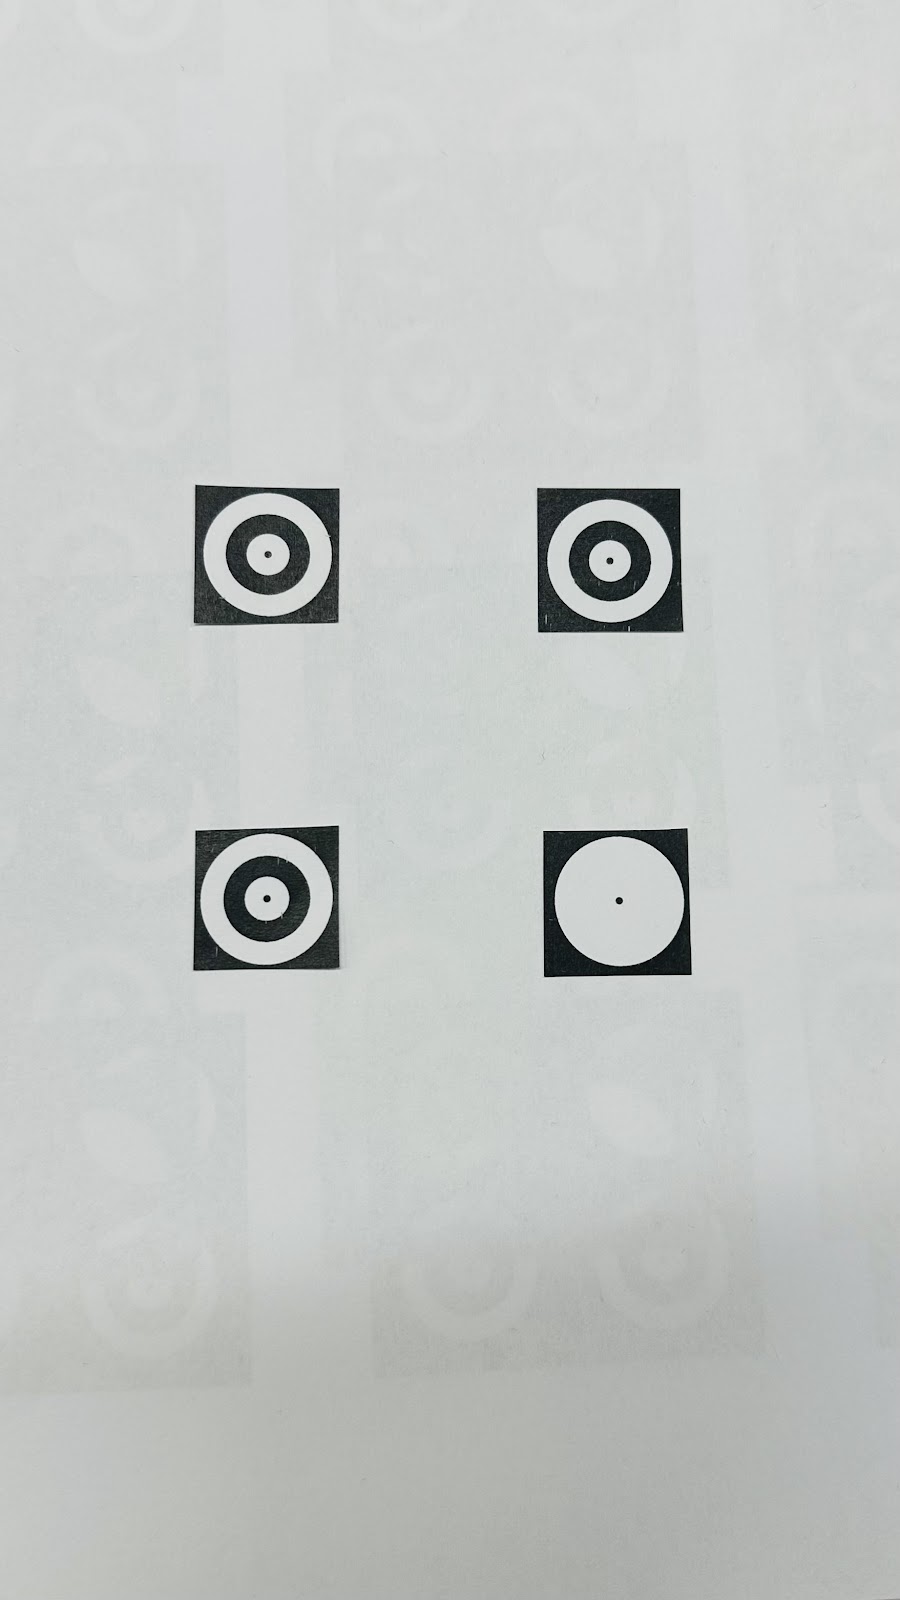
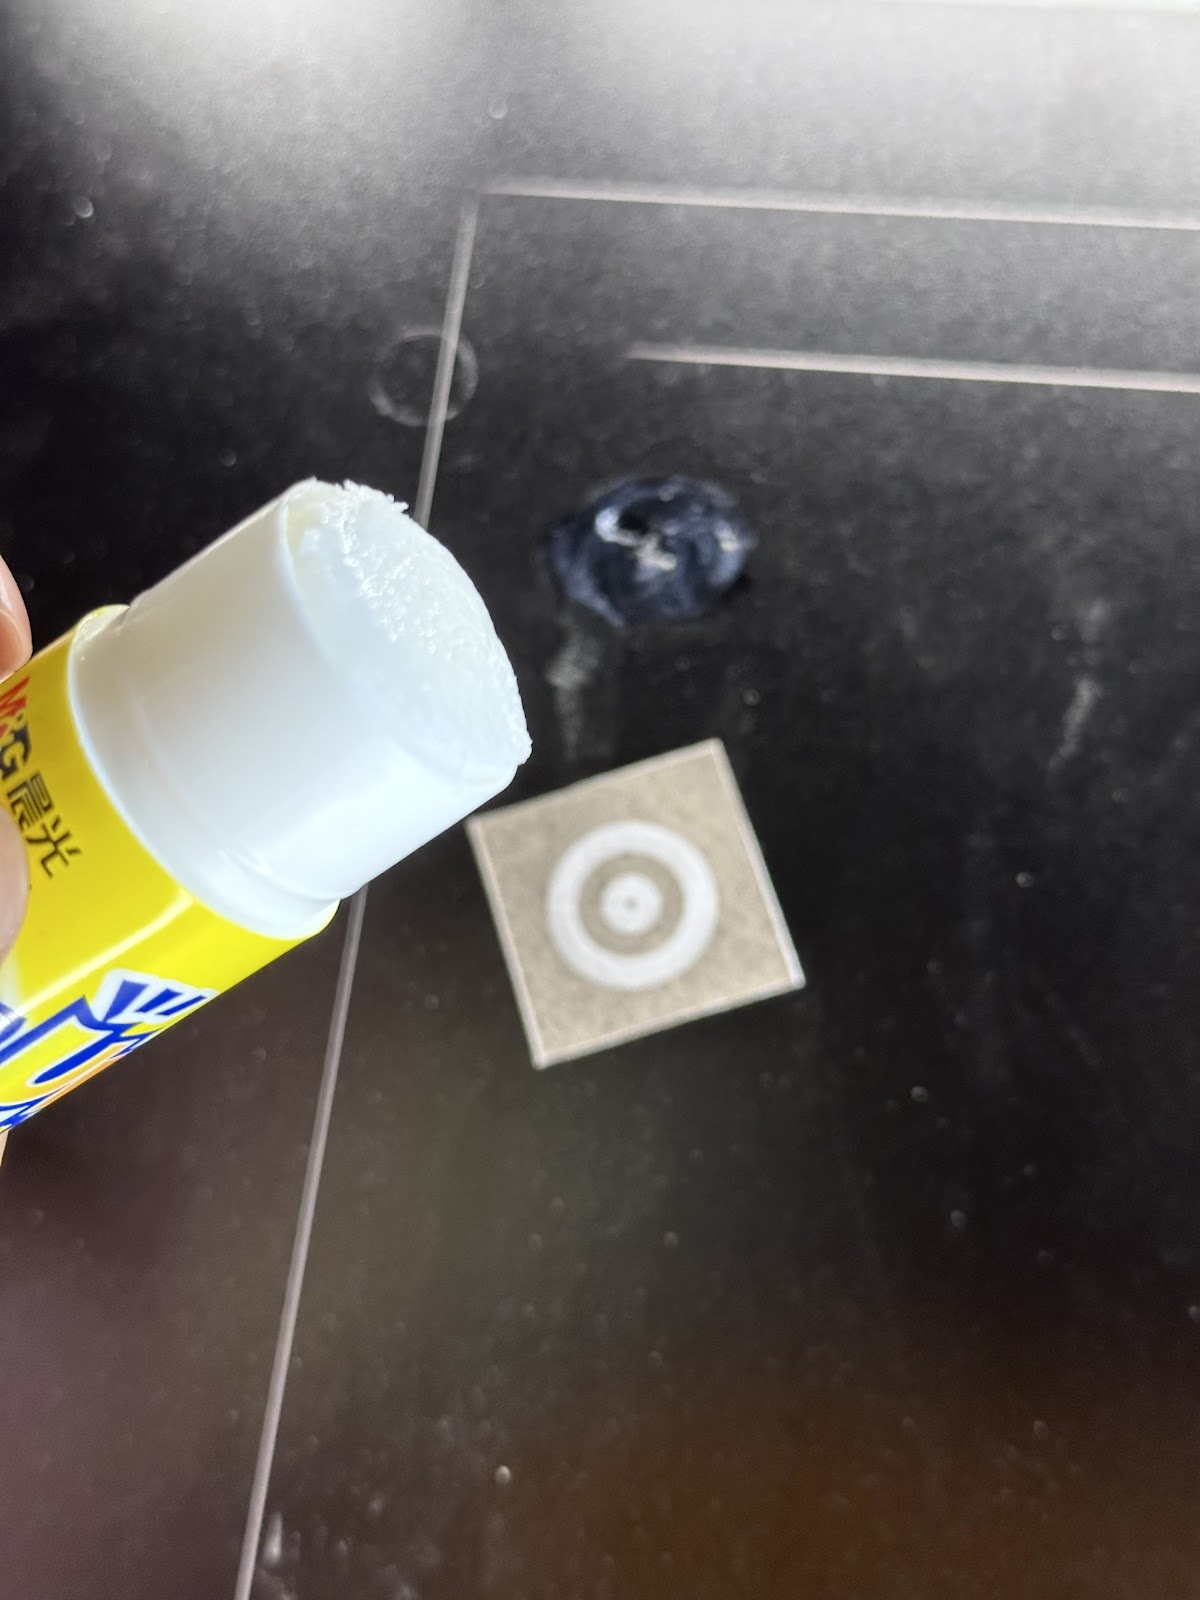
If you have a printer at hand, just print the provided file on A4 paper. Cut out the four patterned stickers and adhere them to your S1's base plate with some glue. It's that simple, yet incredibly effective.
Click here to download the sticker file.
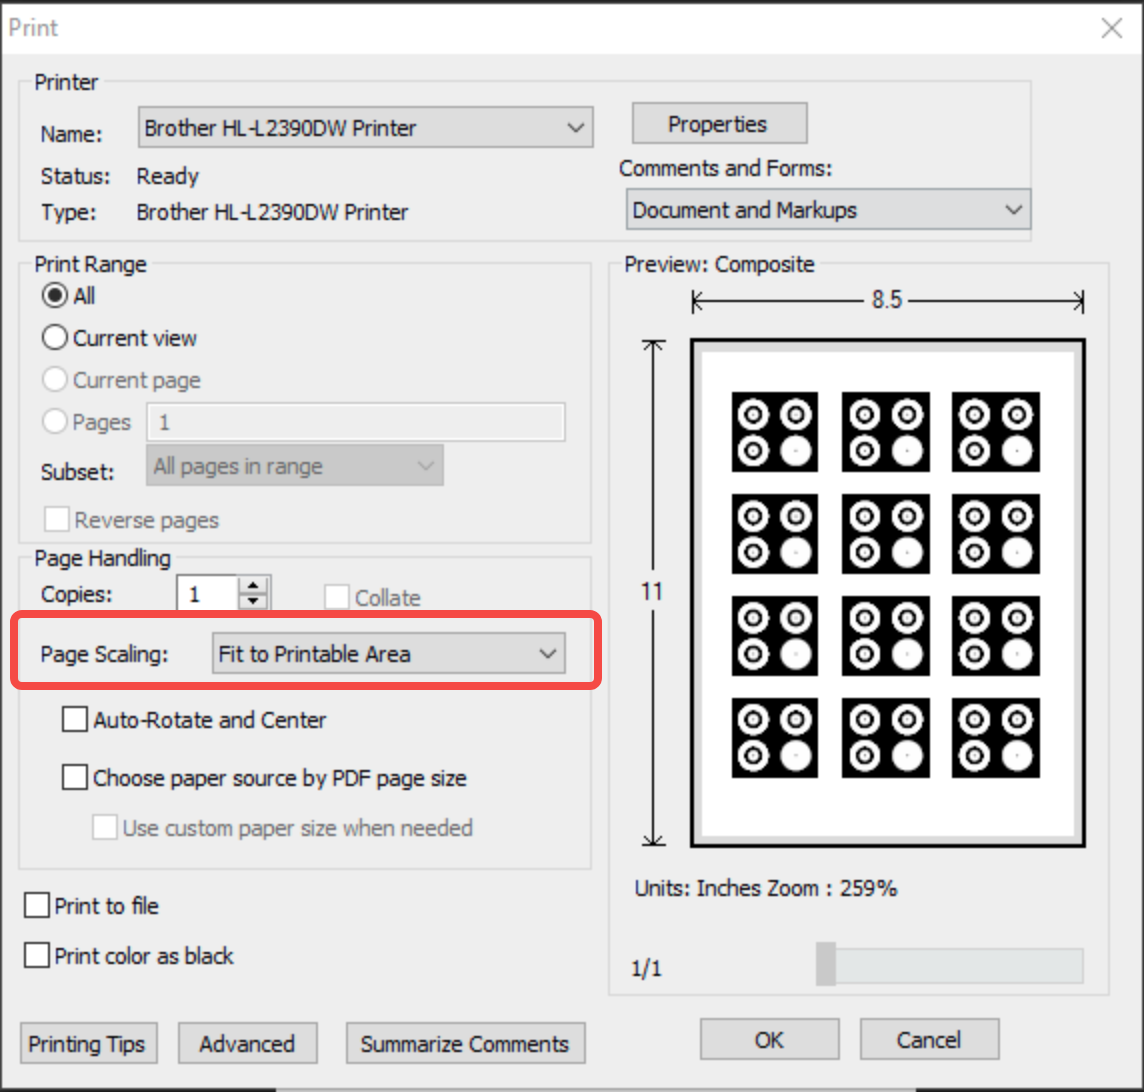
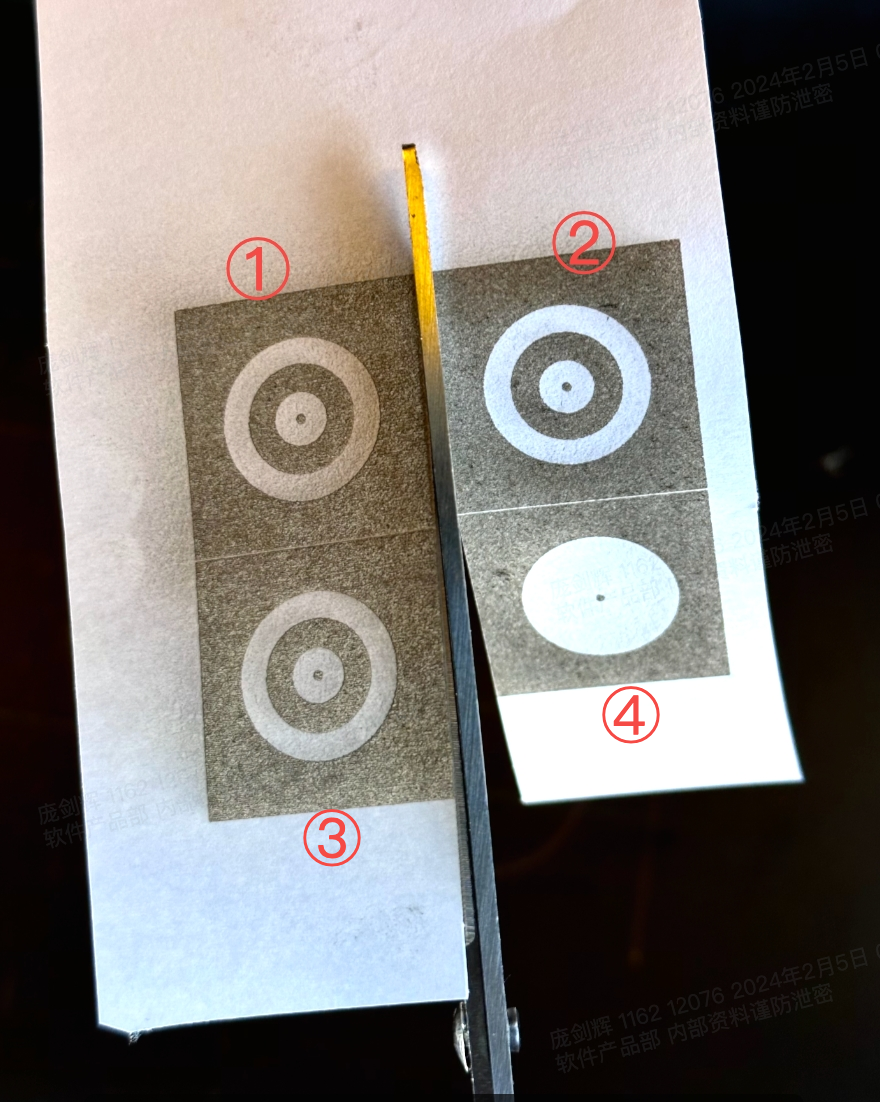
After printing, you'll see four patterns grouped in the order of 1/2/3/4. Cut them using scissors and follow the instructions on the APP to stick them. Use solid glue to attach the sticker to the baseplate of S1, ensuring that the pasting surface is as flat as possible.
 |  |
S1 Laser Processing:
Prepare an A4 paper and secure it firmly onto the S1's base plate. This will be your sticker canvas.
Depending on your S1's laser head wattage, you'll choose a specific file designed to cut the perfect markers for your project.
Click here to download the sticker.
With the paper in place and the correct file selected, let the S1 cut out the stickers.
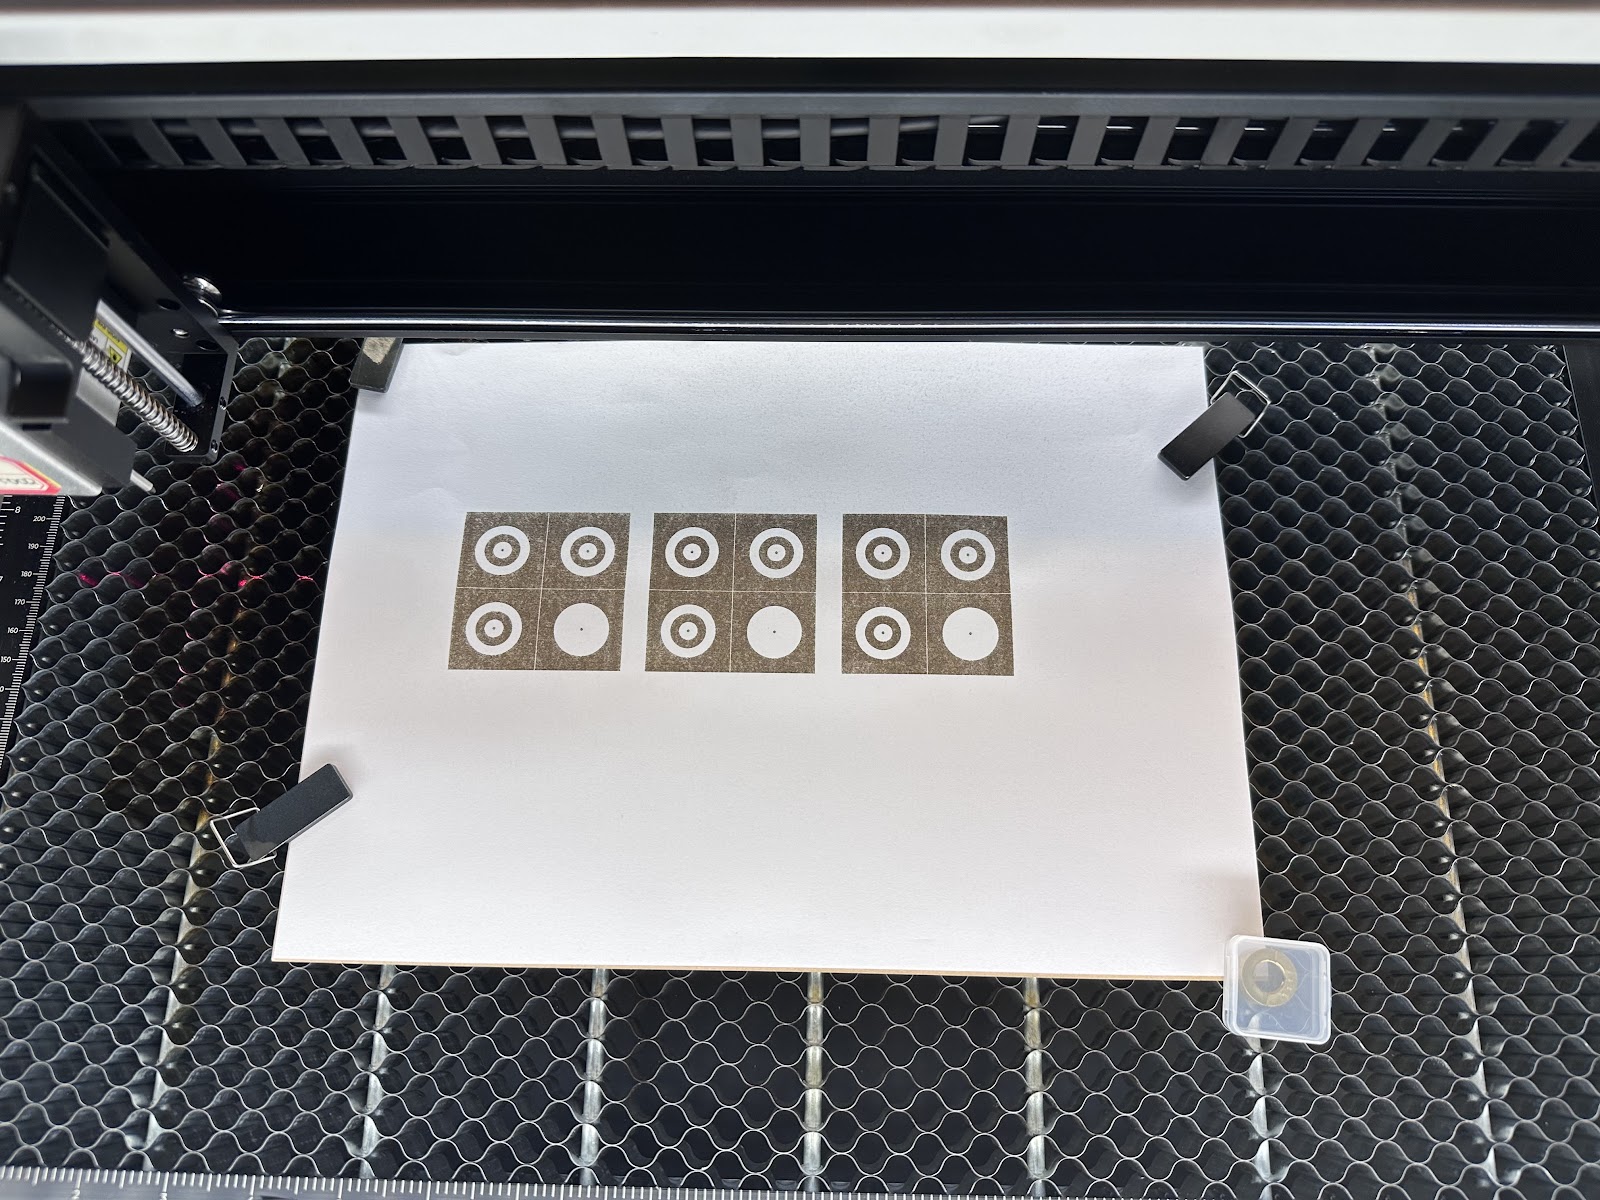
Follow the sequence shown to apply them to the S1's base plate using adhesive glue. This step is crucial for ensuring that the app recognizes the markers.
Step-by-Step Guide
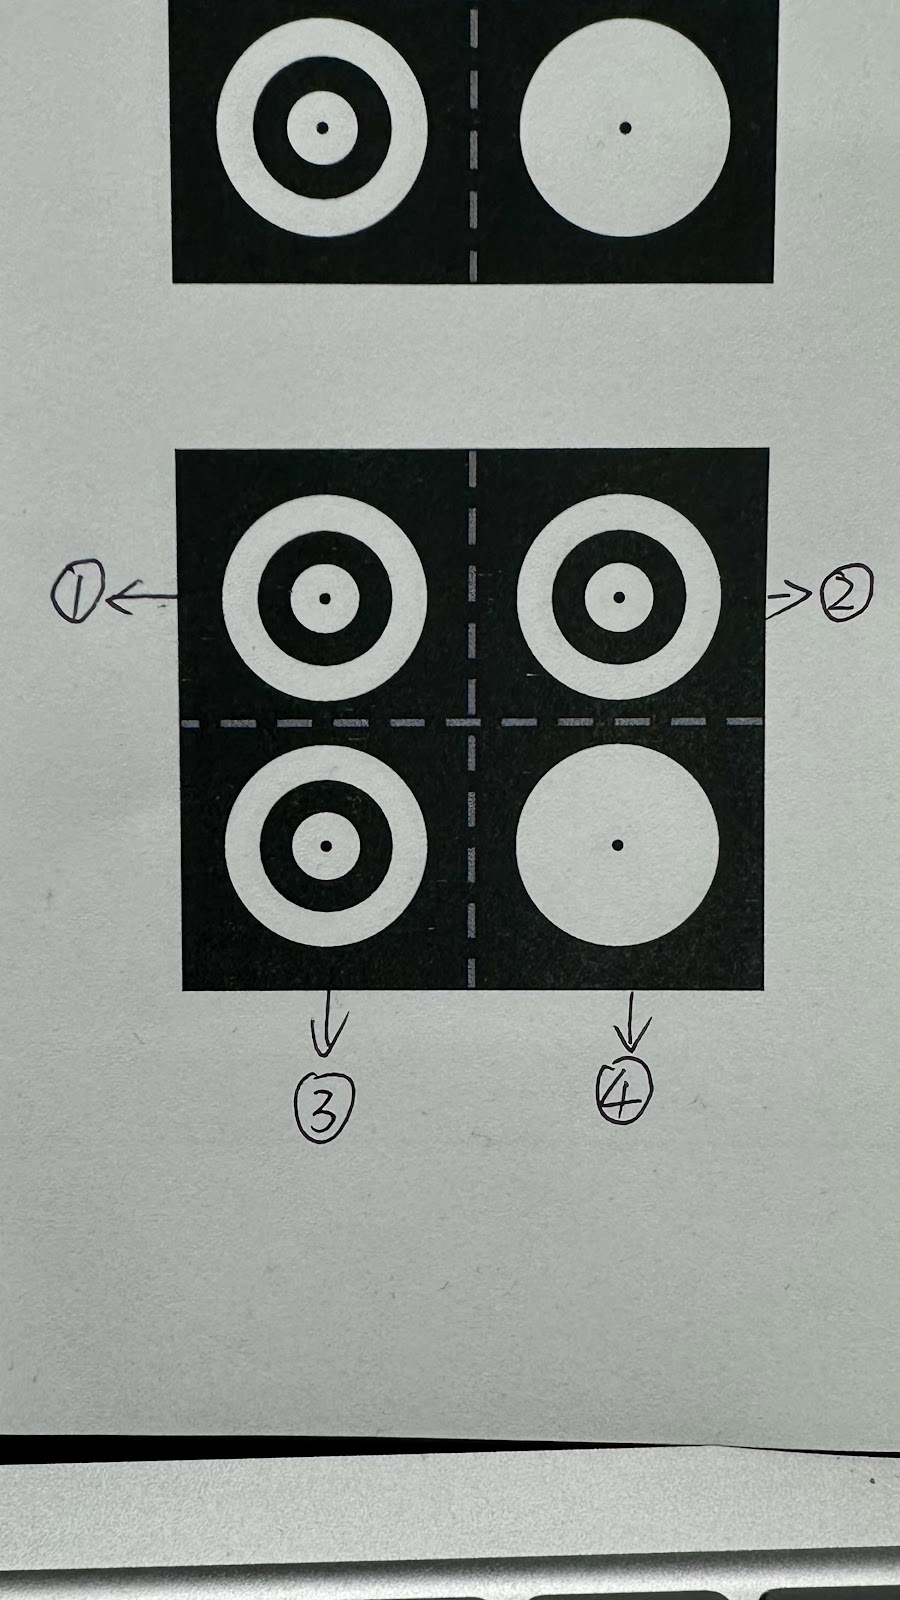
Step 1: Paste Sticker
DIY Stickers: Follow our previous tutorials to get your hands on the stickers, essential for the calibration process.
Paste Sticker: Place the stickers sequentially (1/2/3/4) on your xTool S1's base plate. They don't have to be perfectly placed—just ensure they're spread out at the corners of your workspace.
 |  |
As shown in the sequence 1/2/3/4, according to the instructions of the APP, stick the sticker on the baseplate of S1 with solid glue
 |  |
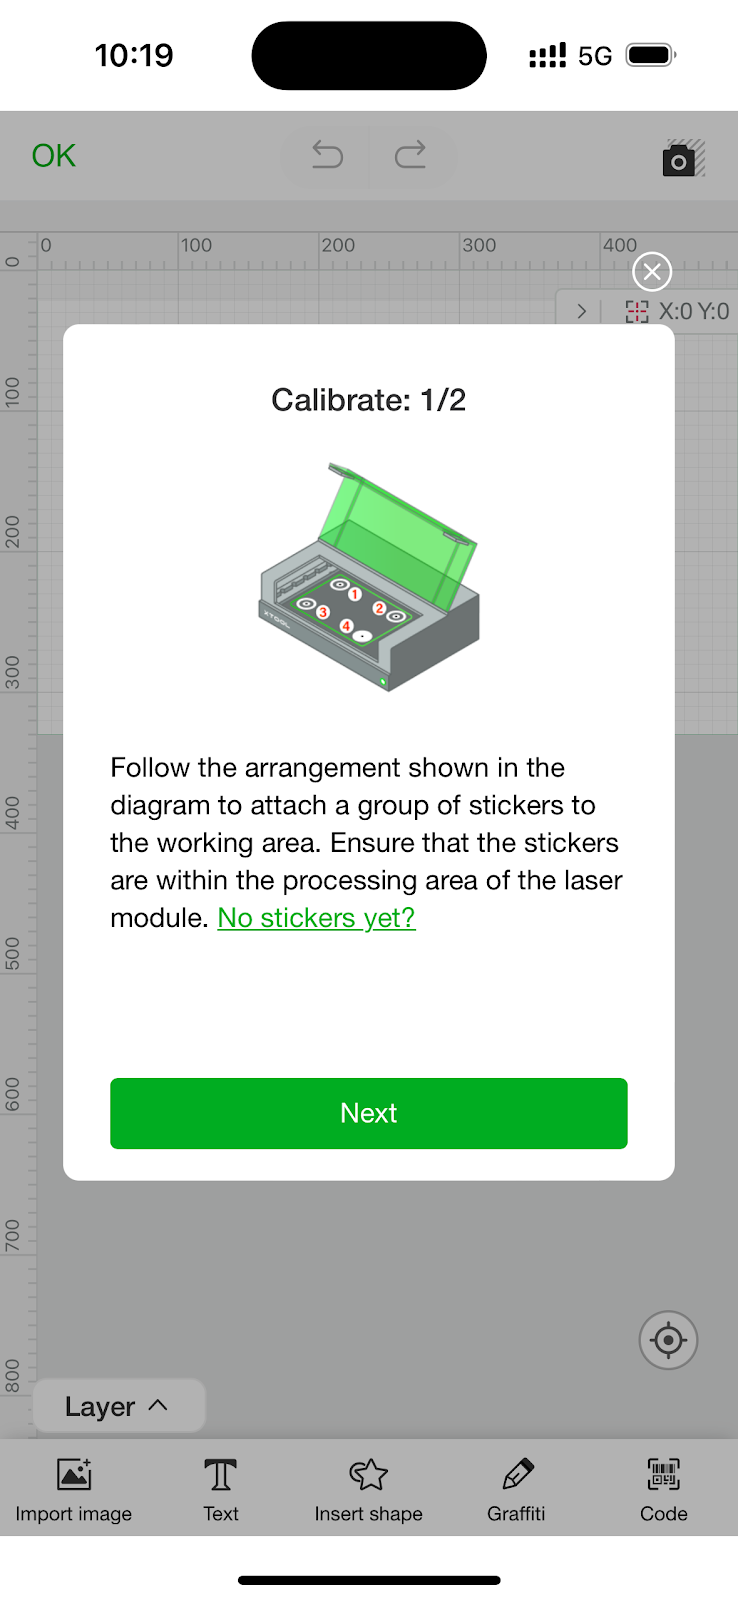
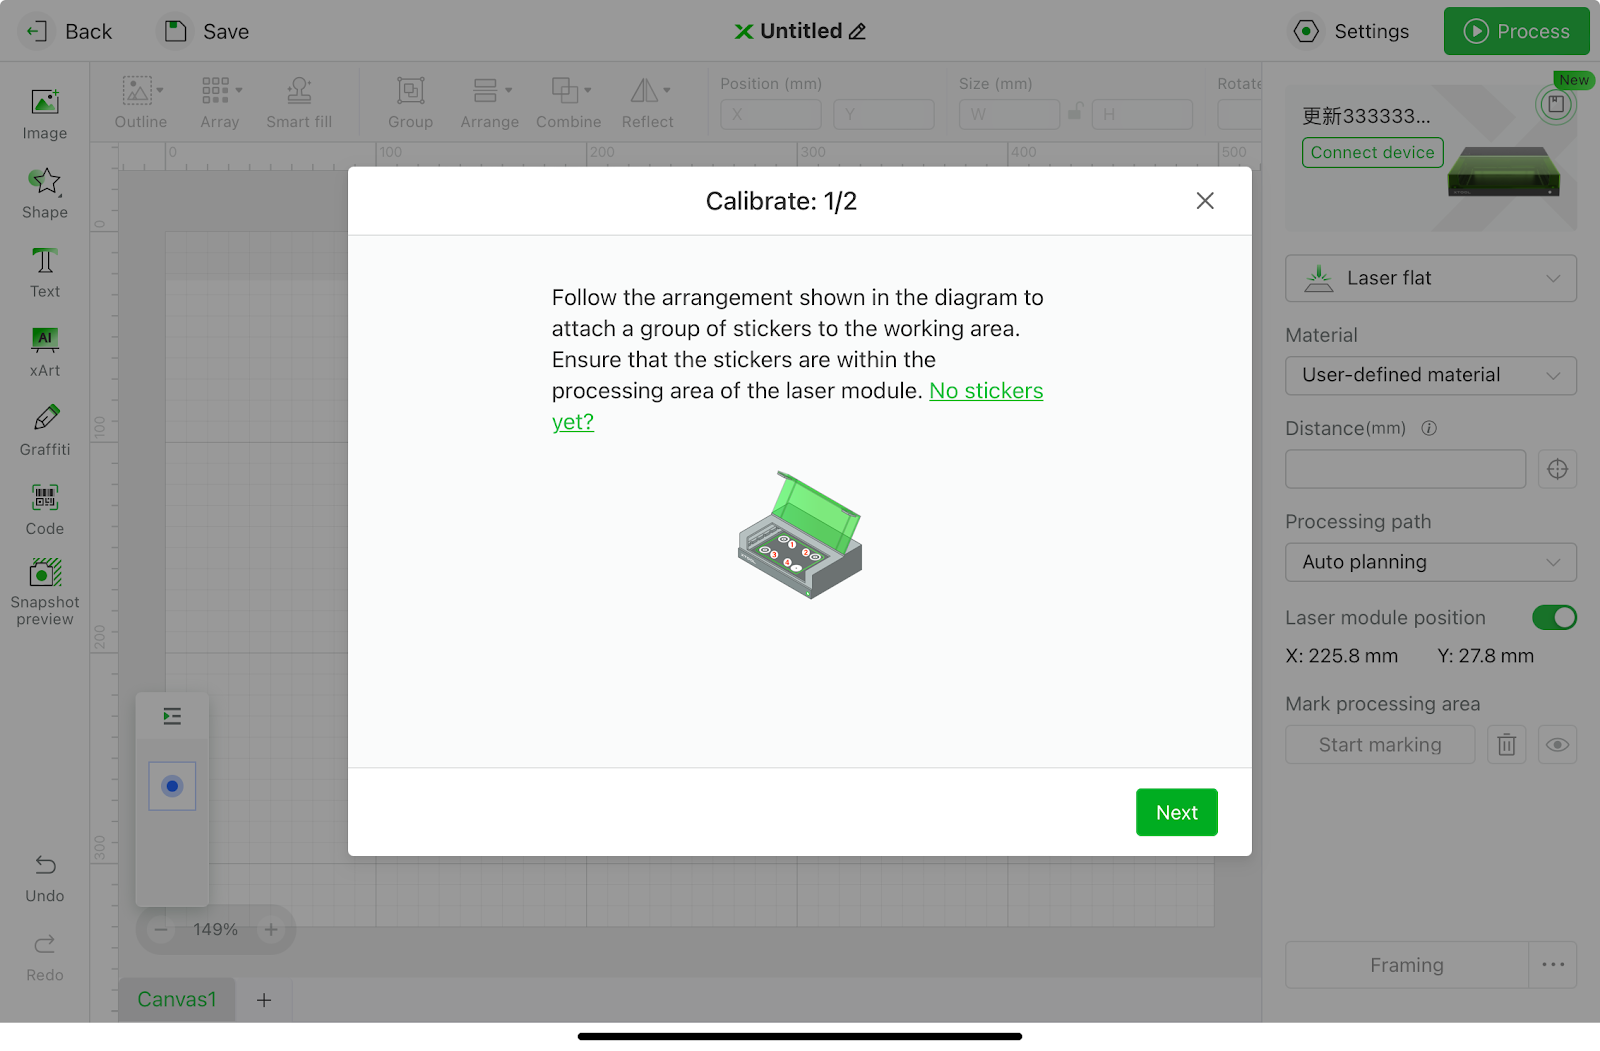
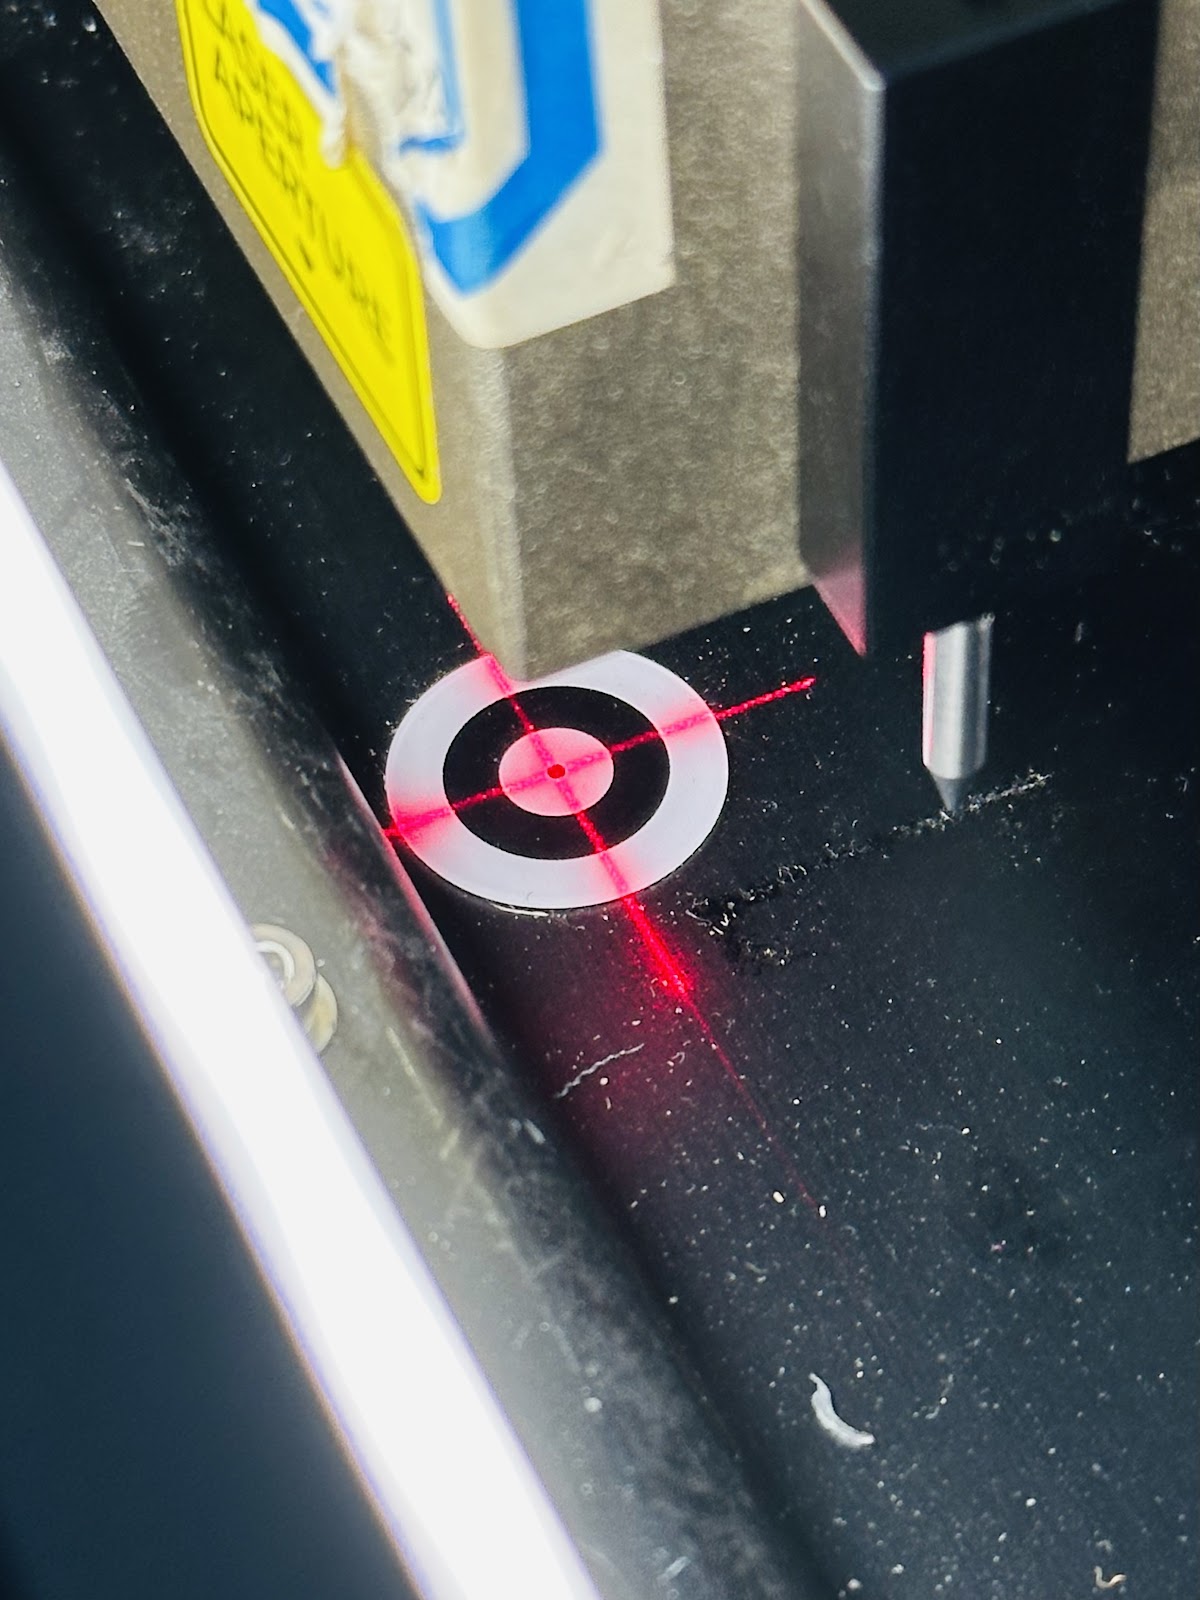
Step 2: Laser Head Calibration
Adhere to the order (1/2/3/4) when calibrating the stickers with the laser head. It's crucial to follow this sequence to avoid any mishaps.
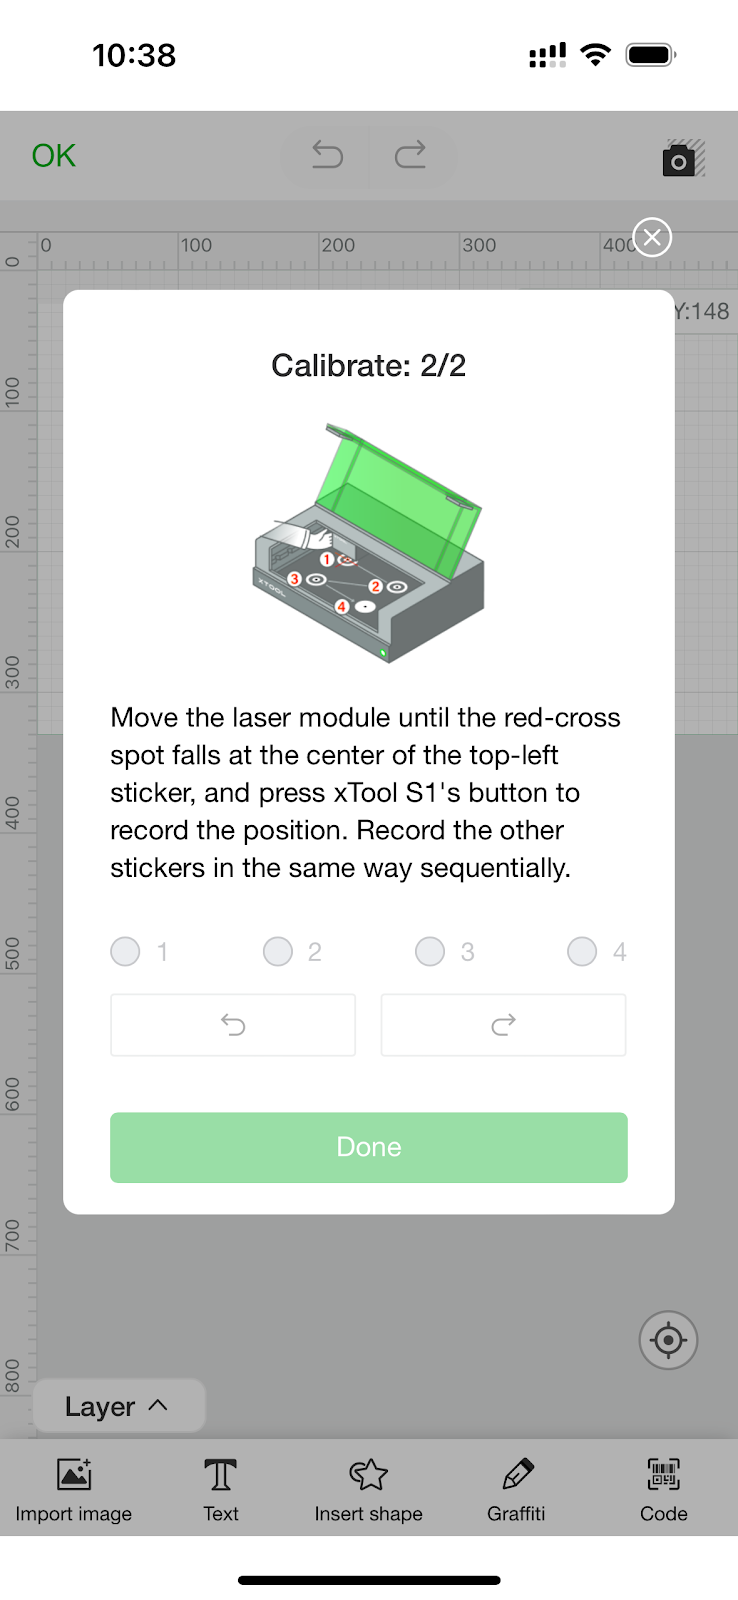 | 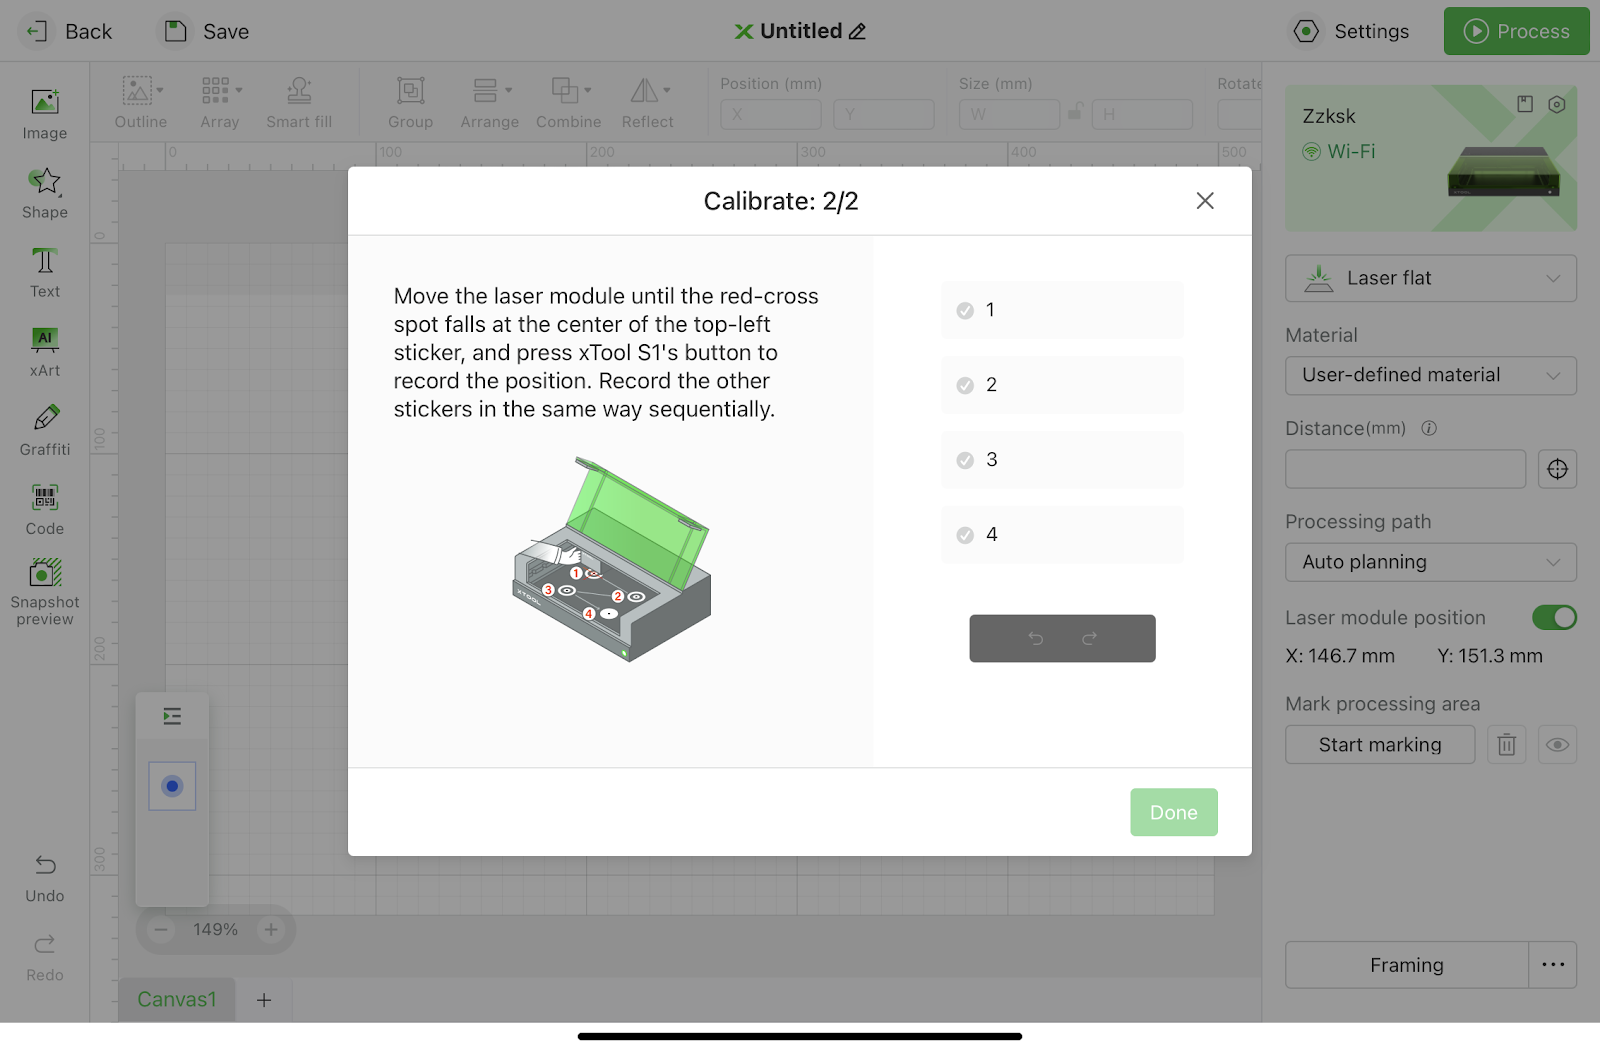 |
The marking process is just like the "pinpoint positioning": simply align the laser head's red cross with the sticker's center and press the device button to mark in the correct sequence.
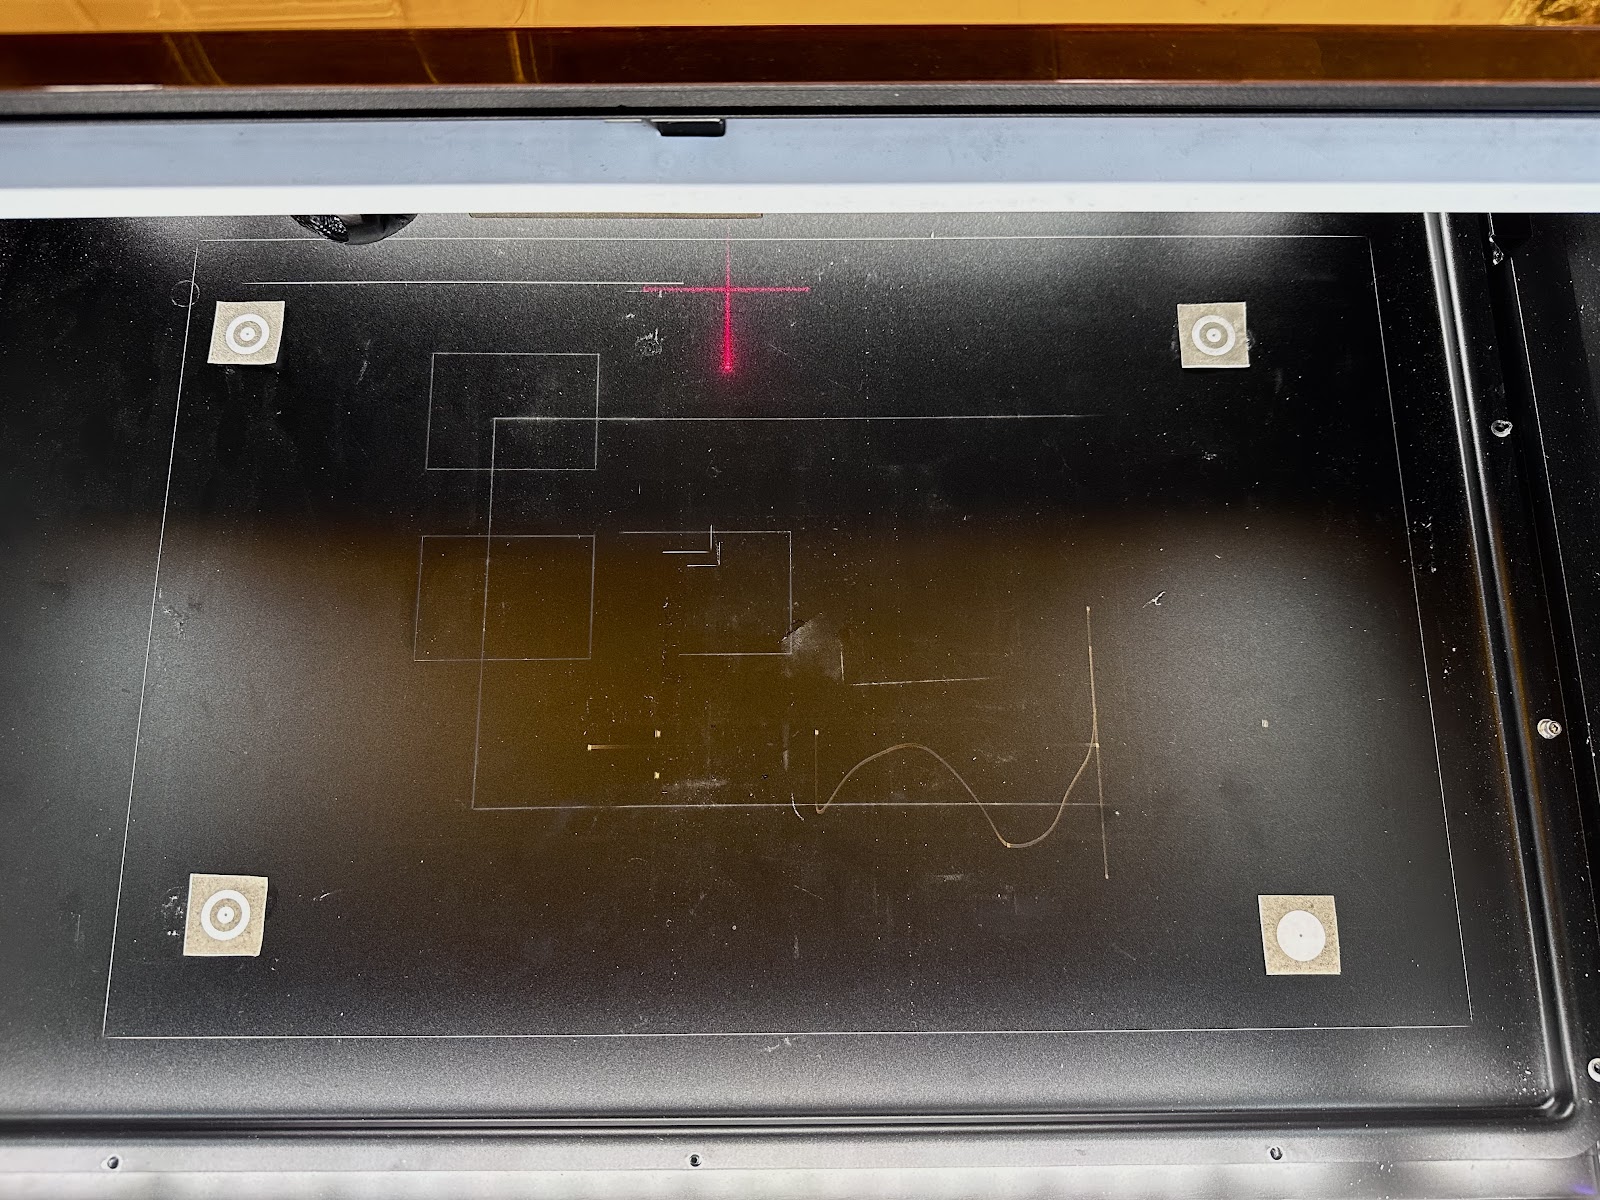
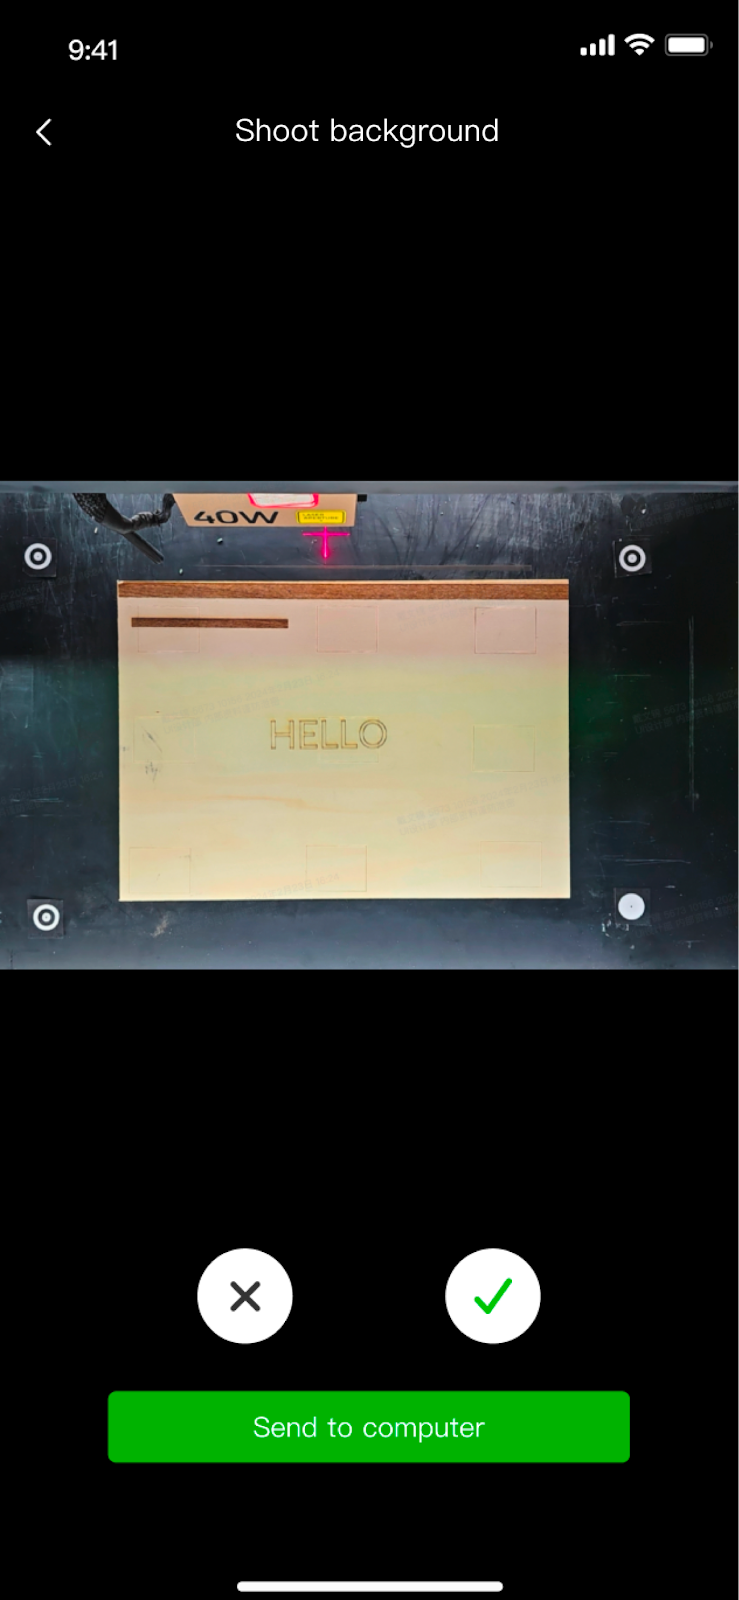
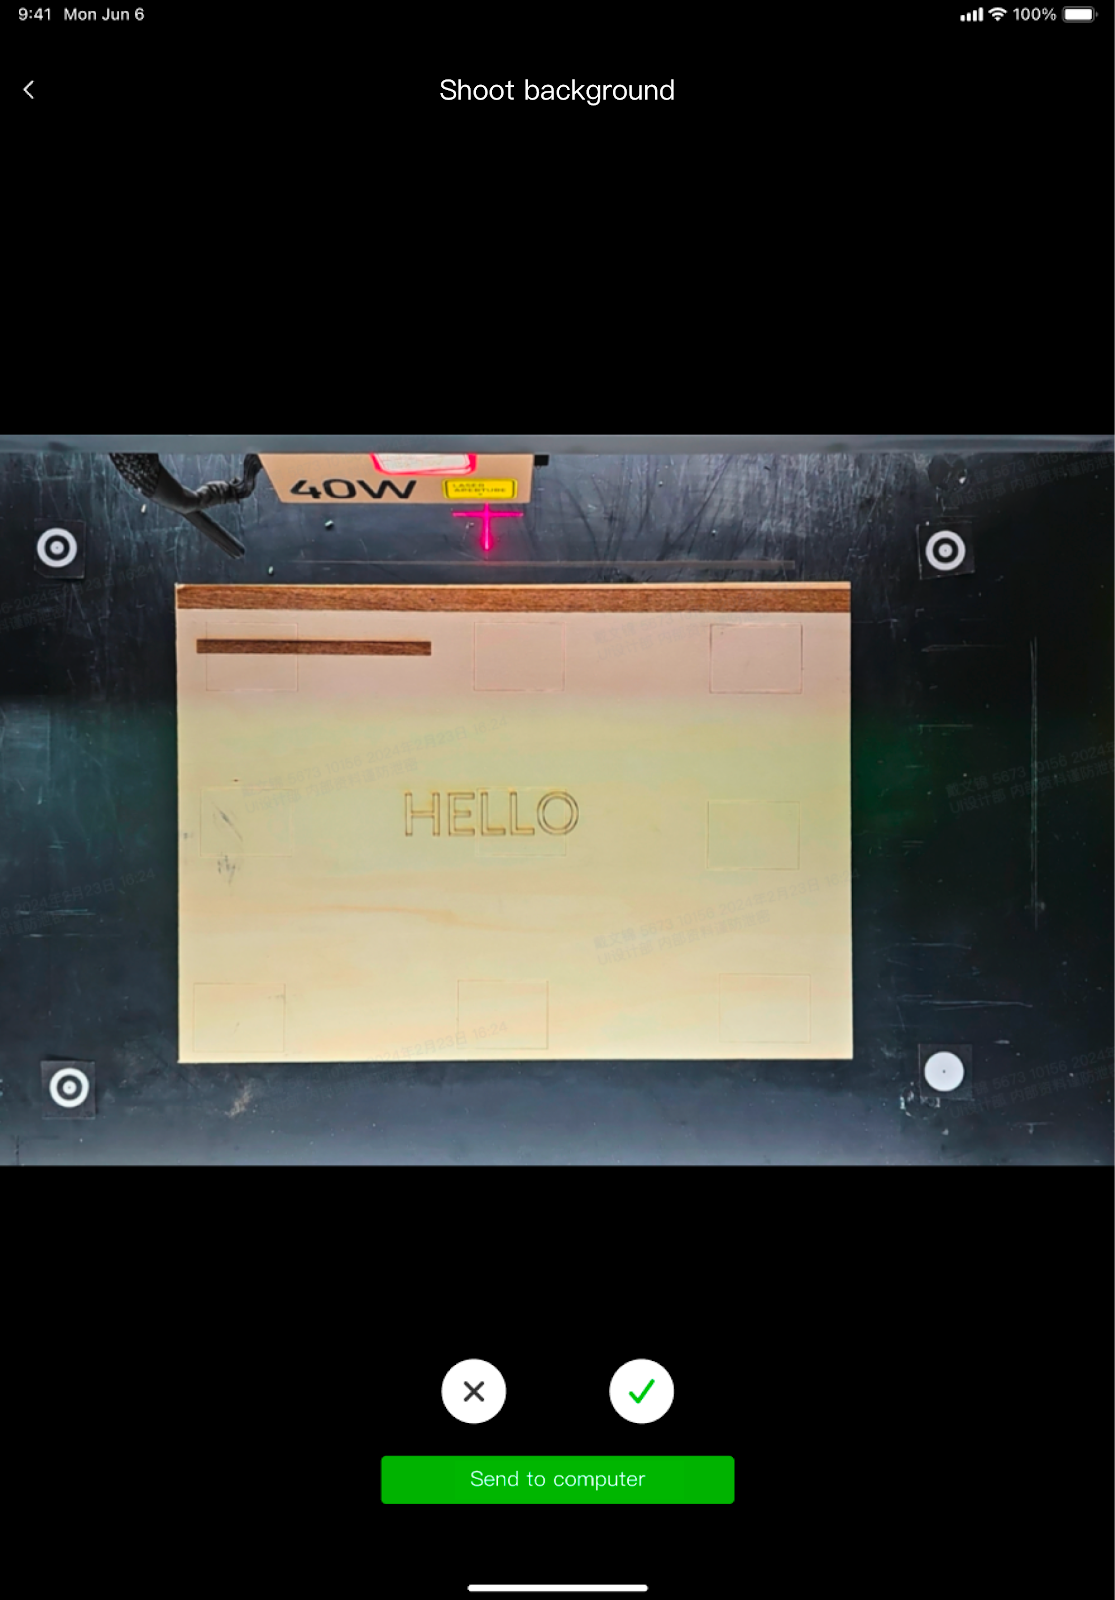
Step 3: Capturing the Background
Place your material on the baseplate, preparing it for the background capture.
Standing in front of the machine, ensure your camera is parallel to the base plate to capture all four stickers. (Tip: the screen can be tilted slightly towards yourself on a horizontal basis for better accuracy)
Pay attention to the interference factors in the shooting. Avoid overexposing the light, keep the baseplate as clean as possible, don't block the stickers, and avoid images that cannot be recognized well.
 |  |
Step 4: Design and Process on PC Software
Once you've captured the background, you can choose to edit directly in the app, or send it to your computer for more complex editing.
Edit in the app
Insert the photo into the canvas on your app. Add design elements, drag the pattern to the right position in the photo
Snapshot Preview is equivalent to a preview of the completed processing position, without the need for framing again, which can greatly save your time.
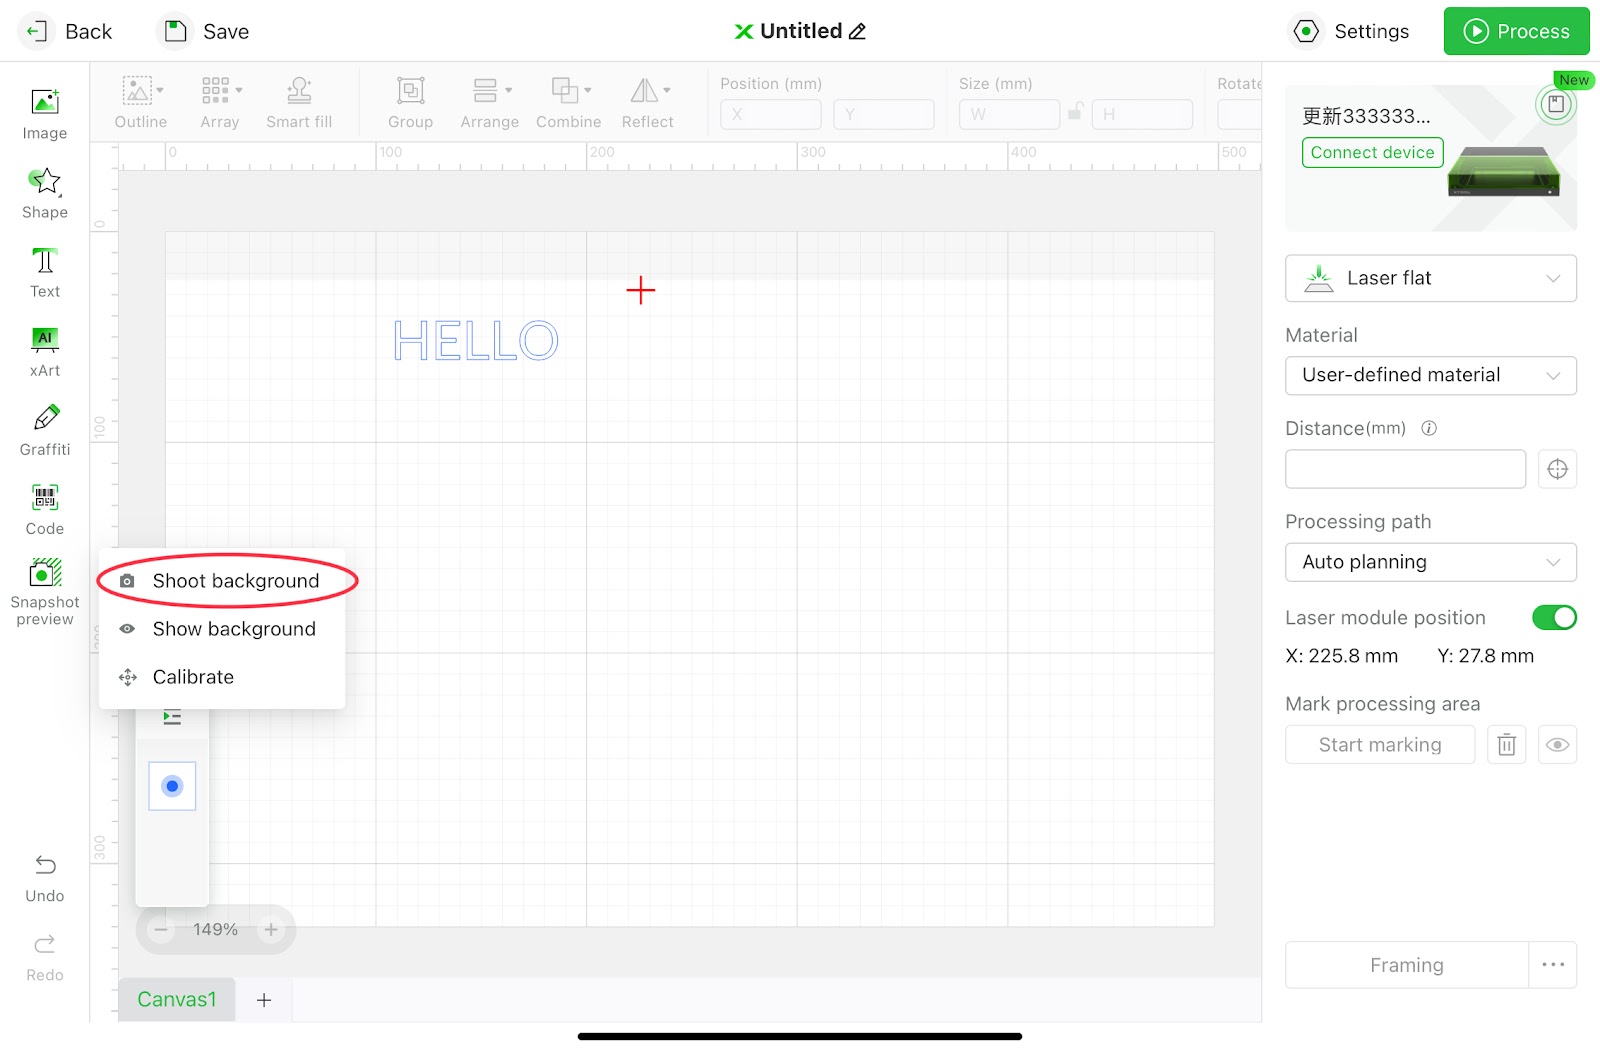
Edit in PC software
We can also choose to send the background photo from our phone or iPad to the PC software, where we can use functions such as Snapshot preview and Smart fill. For the PC, follow this entrance to enter:
Before sending photos, you need to complete the calibration 1/2 and calibration 2/2 operations on XCS on the mobile phone or iPad, and then click [Obtain background] on the PC side to enter the scanning and transmission process
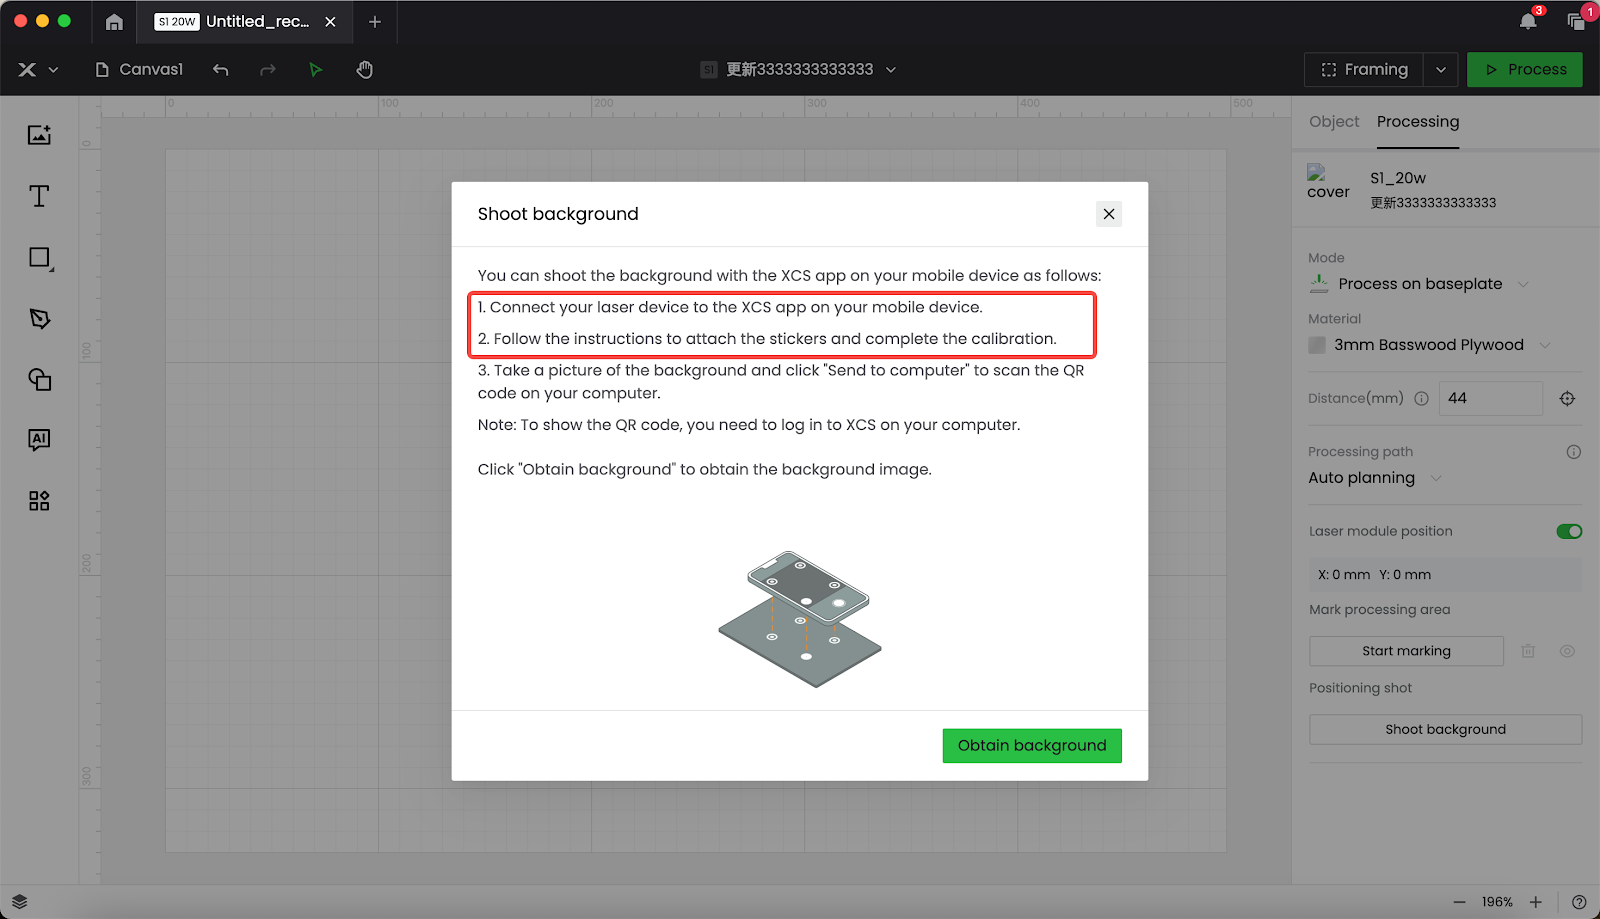
After clicking "Obtain background", it will show the QR code for photo transmission, scan the code with XCS on your phone or iPad (Note: This operation requires login on PC XCS first), and wait for the transmission to complete. Later, add the elements to be processed, place it onto the right place, and set the parameters.

For precise focusing, we suggest only using this feature in the laser plane mode and avoid using it with the riser base.
Services & Help
Learn & Education

Copyright © 2025 xTool All Rights Reserved.